October 21, 2021
RV Modifications Part 3- Solar Panel Expansion and Modification
Our 2020 Winnebago View 24D came standard with a Zamp 30A Solar Charge controller and two SunPower 100W flexible solar panels installed on the roof with an open plug on the roof and a second open plug in the utilities bay to connect additional solar panels. The main electrical consumer to worry about on boon docking trips is the refrigerator/freezer which draws 65W in normal operation mode. Having solar will allow the sun to power the refrigerator during daylight hours and hopefully enough solar energy can be stored in the dual 105Ah flooded cell coach batteries (210Ah combined) to run it through the night and during periods of poor lighting.
Our kids gave us a SunPower 110W flexible solar panel for Christmas, which was a cosmetic match to the existing SunPower 100W panels.
Winnebago and most manufacturers that use the SunPower flexible solar panels simply glue them down onto the surface of the roof. This is inexpensive and easy to do, but comes with some inherent problems. Besides dirt and corrosion, heat is a mortal enemy of solar panels. Even though the SunPower flexible panels are frequently mounted in this manner, the documentation that came with the new SunPower 110W panel plainly states "Care should be taken to provide ventilation behind or underneath the modules, especially in hot environments." Searching the internet and reading about other people's experiences with these solar panels, it is clear that some people only get 2-3 years of use out of these panels, while others see many years of reliable service. I suspect the way they are mounted can significantly effect longevity.
Not only does mounting the panels directly onto the fiberglass roof of the RV prevent ventilation and cooling for the panel, but it also transfers the heat directly to the RV roof, increasing the heat load that the air conditioner would have to deal with. It would be ideal to mount solar panels with a distinct air gap between the panels and the actual roof of the RV. That way, not only will air convection cool the panels, but the panels will also cast shade on the RV roof, further reducing the solar heat load for the air conditioner to deal with in hot environments.
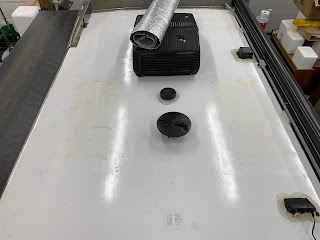
So I set about manufacturing extruded aluminum frames to provide rigidity to the flexible panels and mounting brackets that would allow the panels to be removed for service or replacement without damaging the fiberglass roof of the RV. I had to cut the silicone sealant used to glue the panels to the roof using some Spectra fishing line tied between dowels. This allowed me to remove the panels without flexing them, which might have damaged them worse than the heat might have if I left them as originally installed. I cleaned the roof and repaired all the holes where screws were used to secure the panels to the fiberglass roof with epoxy and fiberglass.


No comments:
Post a Comment
Note: Only a member of this blog may post a comment.